EVS Activities
EVS 1: Clean it Up

Start by reading the Cat in the Hat Comes Back with your child and talking it over together. What happens when the Cat tries to clean up his mess?- Now set up the game. Have your child spread the pink crepe paper around the house, wrapping it over, around, and under furniture. Be careful not to break anything! Encourage him to create a complicated trail just like the mess in the book.
- Once he’s finished setting up, get ready to start the race. Explain to your child that the goal of the game is to clean up the crepe paper mess as fast as he can, rerolling it as he goes. When he’s ready, say “Go!” and start your timer. Call out words of encouragement to him as he plays to keep up the energy!
- When he finishes, congratulate him on completing the race and call out his time. How fast did he go? If he likes, he can do the race again to try to beat his time. If not, how about celebrating with a nice pink cupcake prize?
- You can also play this game with more than one player by having the kids race against each other. Another idea is to do a mummy-wrap game instead: divide into teams and see which one can wrap up a teammate in pink crepe paper the fastest!
Discuss: Why is cleanliness important? How can we reduce the garbage we generate?
Quiz: What should you do when you see other people throwing garbage on the road?
EVS 2: Geology 101

Take a walk with your child. If you’re near a forest, river, or park, look for an area where the soil is exposed, like the side of a bank or a cliff. Can you see the different colors of earth? If you’re in the city, look for a construction pit for a new building. The different layers are easy to see from the safety of the street.- Find a safe spot where your child can dig a small hole. Using a trowel, she should dig just below the top layer of soil. What does she find?
- Digging a little deeper, your child should notice the soil starting to change colors.
Discuss: How deep does she have to go for the soil to change colors again?
What Happened?
It may have surprised you to see that dirt comes in different colors. Just under the grass and twigs, the first layer was probably dark brown or black. This is the topsoil, a layer rich in nutrients deposited by earthworms and essential to plant life. The next layer may be a lighter brown color because of leaching, the removal of salts and minerals by water that has flowed through it. Below this may have been a reddish-brown layer, perhaps with tiny pebbles and gravel or larger rocks and stones. This is the subsoil. You probably didn’t reach bedrock, the underlying rock layer.
Geologists are scientists who study rocks and soil. They can tell the age of the different layers of soil and rock and what the climate was like at the time each of them was formed!
Quiz: Why is the color of the soil different as we dig deeper? What will happen when we dig really really deep?
EVS 3: Yeast Balloon

- Place the bottom of a funnel into the opening of the balloon. You may need to stretch the opening of the balloon a little bit so that it fits.
- Have a parent (or a carefully supervised child), pour the yeast and the sugar into the balloon through the funnel. Then fill the measuring cup with warm water from the sink and carefully pour the water into the balloon.
- Remove the funnel from the opening of the balloon. Tie a knot in the balloon to keep the water-and-yeast mixture inside. Measure your balloon.
- Place the balloon in a warm place and wait. Measure your balloon again.
- Now sit back and wait as the balloon gets bigger and bigger.
Discuss: Why did the balloon inflate?
Soon you’ll have an awestruck child asking, “How did it do that?” Explain to your budding scientist that although it seems like magic, it’s science. The yeast uses the sugar and warm water to grow, and as it grows it expands and gets bubbly. By being “bubbly” the yeast gives off carbon dioxide, the same gas that your body produces when you breathe, and the gas inflates the balloon.
You may not want to use this method to blow up a party’s worth of balloons, but you’ll certainly inflate your child’s imagination and her love of science!
Quiz: What is yeast? Where do we use it in real life?
EVS 4: Oobleck Science: Solid or Liquid?

- Lay the newspaper down to cover your work surface.
- Have your child pour 1 cup of cornstarch into the bowl.
- Help him add in water slowly, until the mixture is thick (about the consistency of syrup).
- Stir a couple of drops of food coloring into the mixture, if your kid wants it to be a certain color.
- Encourage him to squeeze the oobleck between his fingers, asking him questions about the experience. Some great examples include: Can you shape the oobleck into a ball? What happens when you squeeze it in your fingers?
- Have your child pour the mixture into the plastic tub. What happens?
- With your child, experiment with the oobleck. Have him make it into a ball and throw it into the air. Encourage him to leave it out in the sun. Tell him to try to bounce the oobleck. After each experiment, discuss what’s happened with your kid.
Discuss: Can you think of any things that you have seen which are like the oobleck? What happens when we keep something in the sun?
Quiz: How do you think corn starch is made?
EVS 5: Growing Flowers

- Start by showing your child the paper-white narcissus bulbs. Your child will notice that they look pretty plain, sort of like onions. Explain that “bulbs” are like a “super seed” for certain kinds of flowers: inside the plain brown exterior is all the nutrition that these flowers need in order to sprout and flourish.
- Your bulbs will need some help, though, and here’s your job. Start by putting about an inch of sand or pebbles in the bottom of the ceramic pot or dish you’ve chosen. Then place the three bulbs, root side down, on top of the sand or pebbles. (The root side is usually rounded, with small white or brown rootlets; on the sprout side, you can usually see a small green shoot starting). Cover the rest of the bulb with sand or pebbles, leaving the tip of the sprout exposed.
- Now fill your pot or dish with water, making sure that it covers the sand or pebbles completely. Put it in a sunny window, and check every few days to make sure that there’s still plenty of water.
- Depending on the climate in your area, paperwhites take between 3-4 weeks to bloom. First, they’ll send up sturdy shoots, then leaves; then each flower stalk becomes a small bouquet of fragrant white flowers. They are a holiday gift that’s universally appealing: for Christmas, you can wrap them in green and red tissue; for Hanukkah, they are smashing when wrapped in blue. And Kwanzaa’s red, green, and yellow color wrappings make the flowers especially festive. As an added bonus, this is a “green” gift. The flowers continue to bloom for two weeks or so, and then when they’re spent, you can plant them outside, where the soil will help them replenish their nutrients, and they can bloom each spring for years to come.
Discuss: What is the role of roots in a plant? Of leaves?
Quiz: What will happen if there is no sunlight? No water?
EVS 6: Swimmy Science: Raising Tadpoles!

- Place the tadpoles in a container at home. Tadpoles like shade, so make sure you avoid sunny places like windowsills!
- Feed the tadpoles according to the directions, usually a pinch of food every few days. If the water gets dirty fast, you’re probably feeding them too much. Replace dirty water with fresh water, but do make sure you’ve removed chlorine first (see above).
- Watch the tadpoles grow for the next 6 – 12 weeks. To record their growth, have your child draw a picture of them each week. Encourage him to make the drawing as detailed as possible. These critters may be small, but lots of changes are happening, and you should encourage your child to look very carefully–like a scientist! In particular, watch for when the tadpole starts getting close to developing legs; you’ll need to give him a perch. It can be a branch or a pile of small stones.
- Throughout this process, talk, talk, talk with your child about the life stages you’re seeing together in the tadpoles. Using his weekly pictures of the tadpoles at different stages, you can discuss similarities and differences between stages, too…building skills in classification which will be relevant for years of science instruction ahead.
In about twelve weeks, your tadpoles will be full-fledged frogs. Congratulations! If you’re not planning on keeping the adult frogs, release them into a pond…and while you’re at it, you can even slip in a final lesson by talking about the food chain, and the role your frogs will play in it.
Discuss: What are the things that frogs eat? Why do baby frogs look different compared to adults?
Quiz: Why do baby frogs stay away from their mother?
EVS 7: Get Your Head in the Clouds

- Pick a sunny day with lots of clouds and blue sky for this activity. Grab a pillow, blanket, pencil, and construction paper and head outside! Have your child spread out a blanket and place a pillow at one end of the blanket. Then lay down, propping your head on the pillow and bending your legs at the knees. This way you can use your legs as a support for your paper and folder to draw on while seeing the clouds.
- Using your folder (or book), lay your paper on top of the folder. Then look up at the clouds and have your child draw a picture of what she sees. Your child should draw 3 different pictures of cloud shapes, and write one sentence at the bottom of each picture to describe what she thinks the cloud looks like. For example, “This is a huge dinosaur cloud” or “This cloud is pink cotton candy.”
- Next, go back inside and use a table to complete the project. Make your pictures come alive by using your glue to attach cotton balls to the pictures you drew outside of the clouds. Be sure to stretch cotton balls where you saw a cloud that looked like it was streaked across the sky, or make a thick cloud by adding more cotton balls. You can also add color to the page by tracing your words in the sentence with a colored marker, or by tracing the cloud shape around the cotton balls. Repeat this process for all 3 cloud pictures.
- Use a hole puncher to place 1 hole on the top left and top right corners of each page. Then use scissors to cut yarn pieces about 6 inches each. Use the yarn to tie the pages together to make a book which opens from the bottom of the page up. You can also help your child to create a book cover and a title for the book, such as “Sarah’s Cool Clouds!”
This is a great way to teach your child the skill of observation and recording for science. It also helps her practice writing and using her imaginations. So grab your kids and head for the clouds!
Discuss: How do clouds form? Why are they moving?
Quiz: What is there inside a cloud?
EVS 8: Film Canister Rocket

- Whatever you do, don’t try this experiment inside—your rocket will shoot right into the ceiling! Instead, pick a level space outdoors. Don’t forget to put on safety glasses or other eye protection.
- Ideally, your film canister should be one with a cap that fits inside the rim, not over the outside of the rim. Using this kind of canister will make the experiment work much better. But whatever kind you’ve got, open it up and fill it between ¼ and ⅓ full of water.
- This next step needs to happen very quickly (in just a few seconds!) so get your antacid tablet unwrapped and ready. Break it in half and put the film canister lid right next to it.
- Drop the half tablet into the film canister and quickly snap on the lid. Make sure it’s tight. Then place the rocket with the lid down on a level, firm surface.
- Stand back and watch it rocket to the sky!
Discuss: Once your experiment is over, talk to your child about what happened. Explain that sometimes when you combine two materials (like the antacid and the water) you get a chemical reaction. In this case, a gas is created and lots of bubbles form. Since the bubbles of gas have nowhere to go in order to escape, they push against the sides of the canister, pressing against the lid until there’s so much pressure, the lid pops off! Try adding some paper decorations to the canister, to make it look more like a rocket. Ask her if she thinks this will weigh it down or cause it to fly differently. Then try it out and see if her predictions are correct!
Quiz: What would happen if you tweaked the amount of water you put in the film canister or added more or less antacid tablet?
EVS 9: Celery and Food Coloring Experiment

- Fill a tall, clear glass or jar half-full with water.
- Add a few drops of red food coloring and mix well.
- Trim the bottom of a large stalk of celery, leaving the leaves on the stalk.
- Place the celery stalk in the glass or jar. Leave overnight in order for the stalk to “drink” the water.
- Print out the observation sheet for this activity. Have your child draw a picture of the celery stalk “before” it drinks the red water and then have him write a sentence to describe what he sees.
- The next morning, observe what has happened. Let your child tell you where he thinks the water has gone and what has happened to the celery. If he’s stumped, explain that water has been absorbed into the celery stalk, tinting the stem and leaves red. Ask him if he thinks the whole plant gets water for food, and help guide him to see that yes, the whole plant did get the water for food since all parts of the plant have now turned red (from absorbing the red water that was in the cup the day before).
- Have your child complete the “after” portion of the observation sheet. He can draw a picture of what happened and write a sentence to sum up his findings.
Now that you have seen how plants absorb water, try this experiment in a new and different way!
- Take a celery stalk with leaves and trim the bottom.
- Using the scissors, make a slit up the middle of the stalk stopping an inch below the leaves.
- Fill two glasses half-full with water. Add a few drops of food coloring to one glass and add a few drops of a different color food coloring into the second glass.
- Mix the food coloring in each glass and place the glasses next to each other. Put one-half of the celery stalk in one glass and the other half in the other glass. Leave overnight.
- The next morning, observe what has happened. What changes do you notice about the celery and the water? What’s different about this experiment compared to the first one? Each half of the celery stalk will have absorbed the colored water and the two colors will have blended together as they moved up inside the stalk!
Discuss: What happened to the water? Why is the celery stalk red?
Quiz: What do you expect will happen when we put the two different colored beakers together?
EVS 10: How Much Does a Caterpillar Eat?

- To begin this activity you and your first grader must first go on a hunt outside to find a hungry caterpillar and a leaf. Once you’ve found him, place the caterpillar in the box.
- Have your child place the leaf on the graph paper and trace around the leaf with one of the markers.
- Put the leaf in the box with the caterpillar. Be sure to close the lid of the box.
- Use the white paper to complete a “Before/After” activity. Have your child give a hypothesis (or guess) by completing the following sentence: Hypothesis: A caterpillar can eat between ___ and ____ square centimeters of a leaf in one day. You may need to explain to her that square centimeters are simply the boxes of the graph paper. How many boxes of the leaf does she think the caterpillar is going to eat in one day?
- Have your child draw a picture of the caterpillar in the box at this time with the uneaten leaf to document this stage in the experiment.
- Wait until the same time the next day to take the leaf out of the box to examine.
- Have your child place the leaf over the graph paper tracing she made of the leaf from the day before so that both the leaf and the tracing are lined up. Using the other color marker, have your child trace around the places where the leaf has been eaten.
- Have your child use the marker to color in the spaces to show how much of the leaf is now gone.
- Assist your child in counting the number of squares that are in the area that the caterpillar ate. A square that is more than half covered should be counted as a whole square. However, if a square is less than half covered, do not count it at all. Tell your child that this is what is called an “estimate.”
- Discuss with your child how much the caterpillar ate in one day and the difference between the amount the caterpillar ate and your child’s hypothesis.
- Finally, have her complete the “Before/After” activity by drawing a picture of the caterpillar in the box with the eaten leaf and complete the following sentence: Result: The area of the leaf eaten by the caterpillar was ___ square centimeters. My hypothesis was_____.
Afterward, she may want to complete this experiment with other insects as well to find out which one eats the most in one day. Don’t forget to put your caterpillar back in his home outside where you found him once you and your child have finished the experiment!
Quiz: Do you think caterpillars eat at night? Without having to stay up all night to find out – is there a way we can still find out?
EVS 11: Spinning Science: Disappearing Color!

- Have your child divide the plate into six equal sections using the pencil and ruler. As an added bonus, this step is a useful way to reinforce early fraction skills—in 1st grade math, kids are learning about halves, quarters, and thirds.
- Next, have him color each section of the plate a different color of the rainbow. Make sure he leaves no white showing!
- Punch two small holes in the center of the plate, about 1 cm apart. Thread the string or yarn through the holes.
- Hold one end of the string in each hand so that the color disk is in the middle. Wind up your disk by turning while you hold the string. One person holding each end of the string works best to keep the disk tight and spinning fast. When the string is wound up tight pull both hands away from each other so that your colored disk spins quickly.
- When observing the plate, the color will begin to blur together and eventually appear to disappear or turn white!
- You can try this activity a second time, dividing the plate in half, and using only two primary colors on your disk. Will the colors disappear again? Find out!
When you’ve got the plate spinning, your eye can’t separate each color and identify it. In the whirl, all your eyes can tell you is that they see white! If your child is interested in learning more about “optics,” or the study of how we perceive light and color, encourage your child to do some library investigation to find out about color and light!
Quiz: Why is the sky blue? Why do colors change when they are seen under a different light?
EVS 12: Earth: More Land or More Water?

- Describe to your child that this activity is going to answer the question: “Does our planet Earth contain more land or more water?”
- To start the activity, toss the inflatable globe to your child, encouraging him to catch it with both hands, all fingers spread wide.
- After he catches it, ask your child to look where each of his thumbs landed. Did they end up on land or on water?
- Have your child throw the globe back to you. Note where your thumbs have landed.
- Start a chart for both you and your child. After each toss, note where each thumb landed, marking “W” for water and “L” for land depending on what happens.
- Keep tossing the globe back and forth to one another for about 6-10 tosses. Don’t forget to write down your results!
- When you are done tossing the globe and recording your results, look at your chart together and describe what you see. Which one is more: land or water? How do you know?
Note for Parents:
As a matter of fact, there is more water than land on Earth; water makes up about 71% of our planet. All water on Earth is connected across the globe, though we identify separate oceans by name.
Quiz: Why is sea water salty? What does having such a large body of water mean for our planet and for us humans?
EVS 13: Find Out What Makes Popcorn Pop

- With your first grader, take a look at a couple of dry popcorn kernels. What do you think could possibly make this little bean thing turn into a popcorn kernel to eat? The answer is that we heat it very hot, because inside there’s a teeny bit of water. When the kernel gets hot enough, the water inside boils and then turns into water vapor. The pressure builds up inside the kernel until it literally explodes into the beautiful popped corn that people love to munch.
- Pour cooking oil onto the bottom of a heavy saucepan to coat it thoroughly. Then pour in the dry kernels. Cover tightly with the glass lid, place the pot on the stove, and turn on the burner to high heat. Holding the lid on tight, gently move the pan back and forth so that the kernels roll around and are equally exposed to the heat.
- Invite your child to stand on a tall stool—safely clear from any heat or steam, of course—to watch what happens as the kernels start to explode. This should only take 2-3 minutes at high heat, and will be over in another 2 minutes or so, but when it’s going strong it will be great fun to watch!
When the popcorn has popped, sprinkle with salt and add a little butter if you want; or consider getting fancy and putting on a little brown sugar instead. Either way, make it a celebration—science is all around, waiting for curious minds to enjoy its wonders.
Quiz: Why does a popcorn pop?
EVS 14: Where’s the Air?

- Have your child place the jar on a tabletop.
- About ten inches behind the jar, place a short (4-inches tall or so) candle upright, and light it. The flame should be entirely centered behind the jar—not over to the side, and not taller than the jar.
- Invite your child to make a scientific guess—a hypothesis—about this candle. If your child blows hard on the jar, not the candle, will anything happen? Will the candle flame stay the same?
- Now ask your child to blow hard on the jar on the opposite side of the candle—so that the jar is directly in front of her with the candle directly behind it.
Discuss: What happens when she blows on the jar? The candle should go out immediately! (If it doesn’t, move it a little bit forward so it’s closer to the back of the jar). How did this happen? Did the air travel through the jar? Ask your child what she thinks. What happened was that the air separated when it hit the sides of the jar and flowed around its curves to come together again and form a stream that hit the candle. Sure, you couldn’t see it, but it happened!
Quiz: Why did the candle blow out?
When air comes into contact with objects, it flows around the contours of the object it hits, creating forces that can lift kites and blow out candles. In fact, the same property is what make flying a plane possible! This experiment will not only amaze your child, but it will also get her interested in learning some basic physics concepts regarding the important properties of air.
EVS 15: Learn about Life Cycle in a Bowl!

Your first grader is probably very curious about life science, especially when it comes to wiggly creatures in the natural world. Creepy as those little buggies may seem to you, your child’s interest is a great thing: life science is a big part of first grade science curriculum.
So what does this mean, exactly? Often, kids will compare the life cycles of living creatures. Some animals, such as kittens and puppies, are born looking like miniature versions of their parents. They grow and change slightly as they get older, but the changes they experience are gradual and slight. Other animals change quickly and dramatically during their life cycles, undergoing a process called “metamorphosis”. Metamorphosis is especially common in the life cycles of many insects, including butterflies, ladybugs, and dragonflies.
There’s no better way to learn about metamorphosis than to observe the life cycle of a living creature up close. Parents, get your “gross meter” adjusted—we’ve got an adventure for you! Help your child learn about life cycles in a bowl using white, icky, incredibly healthy mealworms!
- Use a sharp, pointed object to punch small air holes in the lid of the container.
- Have your child prepare the habitat for the mealworms: First, put the oatmeal in the container. This is the mealworms’ food. Add a carrot. This will provide water for the mealworms. (There’s no need to provide any other sources of water in the container; however, you’ll want to replace the carrot every four or five days to prevent it from getting moldy or drying out.)
- Dump the mealworms in the container. It’s fine to handle them gently, they do not bite. Be sure to discard of any dead mealworms (dead mealworms appear to be dark brown or black in color). Close the lid and keep the container covered at all times unless you’re observing the mealworms.
- Now it’s time to observe the mealworms like a scientist! Your child should decorate a small notebook so that it serves as an observation journal.
- Have you child draw a picture to show what the mealworms looked like on the first day when they were added to their habitat.
-
Check on the mealworms once every couple of days or so, and add new entries to the journal. Be sure to have your child date each entry. Some ideas to write about in the journal:
- How do the mealworms behave when they are handled?
- Is there any evidence that the mealworms are eating? Growing? Changing?
- What can your child predict about how the mealworms might change?
- Encourage your child to ask questions about what he sees. Why, for example, do most of the mealworms tend to hang out near the bottom of the container?
- Have him design simple experiments to find the answers to his questions.
- After about 10 days or so, your child should begin to notice some significant changes in the mealworm habitat. Worm skins show that the mealworms have been shedding their skin, which means that they are growing. And soon, little curved, creamy white creatures appear to be sleeping in the oatmeal. While they may look like mealworm mummies, they’re actually chrysalises—mealworm larvae that are undergoing metamorphosis, just as a caterpillar makes a chrysalis before it becomes a butterfly.
- Have your child look very closely at these creatures and see if he can see some of the creature’s body parts: eyes, legs, etc. Does this creature resemble the mealworms that he put in the container on Day 1? Why not? What’s happening? Can he guess what is going to emerge from the chrysalises in a few days? (Note: It’s perfectly fine to handle the chrysalises, too. Don’t be surprised if they wiggle fiercely in your hand, though. They hate being in the light, and wiggle to try to bury themselves in the oatmeal.)
- In a few more days, the mystery will be solved. An adult darkling beetle will emerge from each chrysalis! Ask your child to compare these to the mealworms and the chrysalis shells, and draw a diagram in his journal to show the progression from mealworm to adult. Have him think about his earlier predictions. Was he surprised to see the mealworms turn into beetles?
- If you decide to keep the mealworm going a little longer, baby mealworms will soon appear in the oatmeal, and the life cycle will have come full-circle. Adults lay tiny eggs in the oatmeal. The eggs are so small they appear to be fine particles of dust. You may wish to tell your child about the eggs so they understand where the baby mealworms are coming from and include this information in their journal.
Quiz: What happens in the chrysalis stage?
EVS 16: Taste Testing

- Have your child line up the five drinking glasses on a table.
- Let her fill each drinking glass with a different beverage. (The clearer the beverages the better — clear sodas and flavored waters are great choices, but include at least one type of juice.) Make a note of which beverage is in each glass.
- Help her add just a few drops of food coloring into each glass. Make sure she doesn’t use the same color for every glass.
- Let her use a spoon to stir the food coloring into each beverage.
- Have her invite her group of friends (or family members) into the room.
- Let your child hand each taste tester a sheet of paper and a pencil.
- She should ask each person to write down what they guess each beverage is.
- Let the taste testers take a sip of each beverage and record if their guesses changed.
- Have your child reveal the actual beverages.
- Help her look at the results. Did anyone guess all the beverages correctly? Could anyone guess the flavor just by its appearance?
For a more competitive twist, make this activity a family game. Each player gets a point for every beverage they guess correctly! Let your child get in on the tasty action by coloring the drinks yourself.
Discuss: Which area of the tongue is used for which taste?
Quiz: Why did we add food color to the beverages?
EVS 17: Make Window Constellations

- Throw your child’s bedtime routine out the window for one clear, dark night, and take her outside to stargaze. Help her find a common and easy-to-spot constellation, such as the Big Dipper.
- Attach the white paper to the clipboard, and have her use a pencil to draw the constellation, dot-to-dot style. Bring the constellation drawing inside and put it on top of the black construction paper. Use tape to secure the two pieces of paper together. Use the pointed end (a job for an adult) to poke through the dots that your child drew on the white paper. Be sure to poke all the way through both layers of paper.
- Remove the white paper. Have your child use a white crayon or a piece of chalk to connect the dots on the black paper. Assist your child in writing the name of the constellation at the bottom of the paper. Consult a star guide if necessary.
- Finally, use tape to hang the black paper constellation on a sunny window, where the sun can shine through the holes and make the start twinkle in the daylight. Now your child can enjoy the beauty and wonder of the night sky at all hours of the day!
Discuss: Why do we not see stars during day time? Is the earth a star?
Quiz: Why do stars glimmer?
EVS 18: Dancing Raisins

- Slowly, pour the club soda in the glass until it is ¾ full. Ask your child to describe what he sees. (There are bubbles coming from the bottom of the glass up to the top.) Now is a good time to talk about what bubbles are. Explain that bubbles are pockets of air in a liquid. Inside, a bubble is filled with a gas.
- Have your child drop the raisins in the glass. What happened to them? (They should sink, at first, to the bottom). Ask your child to think about why they went to the bottom. (They are heavier, or denser, than the water.)
- Now watch the raisins for a few minutes. What’s happening? (The bubbles attach to the raisins, then the raisins bob a bit, and slowly float back to the top. Once they get to the surface, the bubbles pop, and the raisins sink back to the bottom again.) Discuss with your child why this is happening. The bubbles are less dense than the soda, and so they “carry” the raisin to the surface. Once the bubbles pop, the raisin is denser than the soda once again, and so it sinks. (Note: After a while, the soda will begin to lose its carbonation and will go flat. When this happens, the raisins will just sink to the bottom.)
- Dump out the soda and discard the raisins. Add fresh soda to the glass, and ask your child to try to predict another item that can dance in the soda. Pasta? Buttons? Beads?
Discuss: What are the items that will dance in the soda?
Quiz: Why are bubbles always shaped like balls?
EVS 19: See-Through Egg Science

- Carefully place the whole, uncooked egg in the glass jar. Use a big spoon if necessary.
- Pour vinegar over the egg so that it is completely submersed in the vinegar.
- Cover the jar and observe. Discuss with your child: what is happening inside the jar? What can she see? (She should see bubbles forming.) What does she think might be happening?
- Explain to your child that the bubbles she sees in the jar tell you that the vinegar is dissolving the eggshell. It’s eating away at the “stuff” (calcium, mostly) that makes egg shells hard. Ask her what she thinks might happen if you let the vinegar keep eating away at the eggshell.
- Place the jar inside the refrigerator for about 24 hours. Take it out of the fridge, and use a baster to remove most of the vinegar. (Be careful not to poke or bump the egg! Remember, its shell has been dissolving.) Then pour fresh vinegar over the egg, and return to the refrigerator for another 24 hours.
- Continue in this manner until the eggshell becomes see-through. (The amount of time needed to achieve this varies with the size, variety, and thickness of the eggshell.)
- Gently use a large spoon to scoop out the egg. Now you have an egg without a shell! You can see the insides of the egg, which are being held inside by a membrane. Explain that the membrane is like a skin around the egg. Ask your child to consider why this membrane might be helpful to a growing chick inside its egg. (It keeps out dirt and germs and other harmful substances. It also lets air get in.)
- Encourage your child to observe the shell-less egg and describe what she sees. Can she name any other parts of the egg? (Yolk, egg white or albumen, etc.)
- Finally, let your child hold the egg in her hand over a sink and give a very gentle squeeze. (Watch out! If you squeeze too hard, the egg will explode!) What does it feel like? (It feels like a squishy pillow.) Discuss why the insides of the egg would be a perfect place for a baby chick to grow before it hatches. (It’s squishy, so it’s like a cushion for the growing chick, and the membrane and shell keep it safe.)
Quiz: Why does the egg have a membrane?
EVS 20: Build Up for an Edible Structure

- Try helping to build a small shape to get your child started. Stick 4 toothpicks into 4 marshmallows to build a square (with the marshmallows forming the connectors).
- Next, have your child start moving his sculpture ‘up’. Place 4 toothpicks vertically into the marshmallows with another set of marshmallows on each end.
- Repeat your first square and connect the marshmallows. You now have a 3D square which can form the base of a tower or even perhaps a house.
- Let your child’s imagination take over from there!
Did You Know?
- The resulting sculpture is an example of three dimensional artwork made by combining hard material with a plastic material (this material is mimicked by the marshmallows.
- Sculptors also create sculptures out of stone, wood, glass or metal. Their art is often painted.
- Spending time discussing local public artwork in parks and plazas with your child is a great way to get him thinking about structures. After building structures in three dimensions young artists may start noticing three dimensional shapes in local architecture.
Not only will your child love playing (and eating!) marshmallows, but he’ll learn a bit about construction as well. Kids don’t often get the chance to work on what teachers call “visual spatial skills”– in other words, they don’t often get to work on being able to think in physical space. This is a great project to get them thinking in 3-D!
Discuss: Which of the shapes that were built was the most stable?
Quiz: Draw the diagram of a 3 dimensional shape, which can be built with only 6 sticks.
EVS 21: Take the Paper Plate Snack Test!

With increasing concern about the growing number of overweight American children, it’s becoming more and more important that youngsters know and understand the value of making healthy choices. This is sometimes a hard concept for children to grasp. To a young child, the premise is simple: Foods that taste good are good for us, too… right? Sadly, we adults know better. Foods that “taste good” are often full of things our bodies don’t need, such as sodium, sugar, and fat.
When it comes to nutrition, a good place to start with young children is to help them understand the things that are in our foods that they can’t see. In this activity, your child will use a simple test to determine which of his favorite snack foods is full of fat, something his body only needs in small amounts.
- Have your child use a paintbrush to brush a small amount of water on the left side of a paper plate. Use the other paintbrush to brush a small amount of oil on the right side of the paper plate. Use a pencil to label each sample. Leave the plate undisturbed and give it about an hour to dry.
- After about an hour, check the results. Have your child compare the water side to the oil side and describe what he sees. Explain that oil is a fat, and fat leaves a spot or a ring on paper. Fats are present in lots of food, and our bodies do, in fact, need some fat to keep us warm and give us energy, but eating too many fatty foods can be harmful to our bodies and our health.
- You can even have him touch each side to feel the difference. The water side will feel clean, while the oil side will feel slick and leave a residue on his fingers. Explain to him that this is similar to what goes on in your body when you eat food. Water cleans your body and nourishes it, while oil (fats) leaves behind a kind of “residue” once it’s been processed, adding to the fat in your body.
- Now have your child test some pieces of food, two pieces per plate. Have him set the food pieces flat on the plate, and label each piece. (Note: Something like a potato chip, which may not lay flat, may need to be crunched up. A grape may need to be sliced down the middle, etc.)
- In an hour or so, have him check his paper plate tests. Which foods were fatty (i.e. which foods left a ring like the oil? Which did not appear to have lots of fat in them? What can your child conclude about which snack foods are the most healthy?
Encourage your child to draw connections between what he has learned in this activity and the food that he puts into his body. It’s first and foremost a parent’s job to set their children on the right path for a long, healthy future. Don’t be surprised if your child starts making healthier choices after doing this activity!
Discuss: Make a list of healthy foods based on this experiment.
Quiz: Why is junk food unhealthy?
EVS 22: Flashlight Science: Transparent or Opaque?

- While you are holding a white sheet of paper, your child’s job will to be in charge of the flashlight, as the Official Flashlight Holder and your assistant. Tell him to not turn on the flashlight until you give the signal.
- Without letting him see what you have in your hand, hold one of the cut out shapes so that it touches the back of the white paper. Clip on the shape with the clothespin or paperclip so that your hand doesn’t obscure the shape. Ask him if he can see what the shape is behind the paper.
- Next, have him turn on the flashlight. Ask again if he is able to see the object behind the paper and guess what he thinks it might be?
- Ask him to think about why he was able to identify the shape after the light was turned on. Discuss with him if he thinks the same experiment would work by putting the shape behind a book instead of a piece of paper? Try it to see. Encourage him to figure out for himself that light can pass through some things but not others.
- Discuss his observations and introduce the terms opaque and translucent. Explain that objects (like books) that do not allow light to pass through are called opaque; materials (like paper) that allow some light to pass through are called translucent. Challenge him to name other objects that he thinks might be opaque or translucent.
- Next, let him try shining the flashlight underneath his fingertips, then move the light down toward his palms. Ask which part of his hand he thinks is translucent? (his fingertips) Which part is opaque? (his palms)
- Now, ask him to name a material that he can see through without a flashlight. Materials that let all of the light through, like glass, are transparent. Ask him if he can think of any other everyday materials that are transparent? Offer some examples, such as water or saran wrap.
- Let him experiment with the objects you have collected, using a flashlight to determine which are transparent, translucent, or opaque. Transparent objects might include a glass jar, a clear or colored plastic glass bottle, clear or colored cellophane. Some toothbrush handles are transparent while others are opaque. Paper and most fabrics are translucent.
The important vocabulary words he’ll be learning in this activity are more than just important vocabulary words: they are also fundamental scientific concepts that he will build upon later in the years to come. Soon you might find him with the flashlight on a regular basis, telling you all of the exciting new items he finds that are transparent, translucent and opaque!
Quiz: Why is some food packaging transparent and some opaque?
EVS 23: Delicious Salads
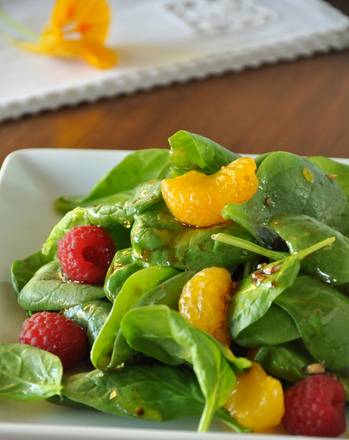
- Baby Spinach Salad with Mandarin Oranges, Raspberries and Chicken (serves 4): Toss together the baby spinach, mandarin oranges, chicken breast and raspberries. Drizzle a vinaigrette on top for a light main course or a lunch.
- Spring Greens with Strawberries and Glazed Walnuts (serves 4): toss the spring salad greens, the strawberries and the glazed walnuts together. Drizzle with vinaigrette. For an extra gourmet touch, try adding a little goat cheese or gorgonzola—but you might want to do that plate by plate.
- Butter Lettuce with Grapefruit, Mint, and Avocado (serves 4): Toss the butter lettuce, grapefruit, mint and avocado and drizzle with vinaigrette for a great side salad!
- Glazed Walnuts (this recipe makes two cups—you’ll use ½ cup for our salad, but save the rest for other batches or for a scrumptious treat later). To make the glazed walnuts, start with 1 egg white, beaten to foamy stage. Add 1/3 cup brown sugar and ½ teaspoon of cinnamon. Mix thoroughly, and then add 2 cups of chopped walnuts. Stir to coat the walnuts, and then place them on a cookie sheet sprayed with a light coating of oil. Bake at 275° for about 20-25 minutes, or until the nuts are lightly brown and the coating is fairly crisp (it will harden completely when the nuts have cooled). When cool, break the nuts into bits and store in an airtight container in your refrigerator for up to 3 weeks.
Quiz: Why are salads healthy?
EVS 24: Water Pollution: Can You See It?

- Using the four large jars, collect samples of water from four difference sources. Good sources to use might be tap water, bottled water, rain water, or water from creeks, ponds, rivers, or even the ocean.
- Using the masking tape and a marker, label each jar so that you will be able to easily identify the source of the water.
- Fit the coffee filters just inside the mouths of the large, wide-mouthed jars. Take one of the water samples, and slowly pour the water through the filter into the other jar. Repeat for each water sample. Don’t forget to label the filters and new jars, so they don’t get mixed up.
- Open each filter and examine it through the magnifying glass. Discuss the filters with your child. Which filter is the most discolored? Which filter caught the most particles? Did any of the samples leave a colored residue on the filter?
- Discuss with your child how the water in rivers, streams and ponds can become polluted. Where do pollutants come from? (A major cause of water pollution is due to the chemicals and dyes that factories release into rivers. Individuals who drop litter in water sources like rivers, streams, or creeks, also contribute to water pollution.)
Extension Activity
Help your child understand that water can be polluted even if the pollution is not dramatically visible.
What You Need:
- Large, clear container
- Cup
- Red food coloring
- Water
- Pour one cupful of water into the large container.
- “Pollute” this water by adding a little red food coloring.
- Add water, one cupful at a time, until the water looks clear.
Discuss: Assist him in making connections between this experiment and the real world. Some questions to think about are: Can we see the dye? Is the dye still in the water? If people were to drink from this water, would they also drink the dye? What would happen if the dye was poisonous or dangerous?
Quiz: What can your family do to reduce water pollution?
EVS 25: Air Pressure Experiment

- You may want to conduct this experiment outside. Use a thumbtack or nail to poke holes in the dish detergent bottle. Make 3 – 4 holes to get started, placing some holes near the top of the bottle and some holes near the bottom.
- Tell your child that you are going to pour water into the bottle. Ask your child to predict what he thinks will happen.
- Hold the bottle over a sink or bucket and fill the bottle with water.
- As the water flows out of the holes, talk to your child about his observations about the design water fountain jets. (The water flow will resemble a fountain.) Is the jet stream of water at the top of the bottle smaller or larger than it is at the bottom of the bottle?
- This time, fill the bottle again and close it with the cap. Have your child squeeze the bottle and ask your child to observe what happens. Why does he think the water came out that way? How is the pressure of the squeeze related to the design of the water as it comes out of the holes? Do the streams of water look different or act differently when the cap is on the bottle as opposed to when it is off?
- Try adding more holes to create a different water fountain jet design, add more water, and watch the new fountain jet shapes.
Discuss: What happened? Why did it happen?
Quiz: Describe the journey of the water from the source to your tap.
EVS 26: Make a Lunchbox Magnet Board

- Explain to your child that every good lunch should contain four main elements: protein (such as meat, cheese, beans, rice, and peanut butter, etc), carbohydrates (kids will recognize bread, crackers, rice, among other things), a fruit and/or veggie, and something healthy to drink. In addition, many schools also ask for a snack, and again you can talk about healthy options with her.
- Once you’ve laid out this basic information, you both can create your magnet board. Start by marking out a chart, like this:

- Then invite your child to help you make cards for each type of food. For items like bread and crackers, invite your child to help you cut out pictures and labels and paste them down on your cards. For items that don’t come with illustrated packages, such as some veggies or fruits, encourage your child to draw a picture and then write the word for each food beneath. If categories seem challenging, you can also try color-coding your cards.
- Finally, if you plan to pack sandwiches or certain rice dishes, with a combination of ingredients, try using a full-size, 3×5” card, which can straddle two categories on your chart.
- On the back of each card, glue a magnet. Store the cards in an envelope or basket near your magnet board area.
- The night before a school day, invite your child to plan her lunch with you. Pull out labeled pictures of the foods that you’re comfortable providing for the next day, and let your child select and categorize each one. Do it regularly, and you can expect some impressive new knowledge and pride as your child learns how to identify, pack – and hopefully eat– a healthy, balanced school lunch!
Discuss: How the body utilizes various food categories.
Quiz: Make a meal plan for your next day of school.
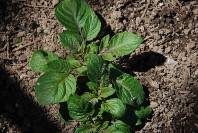
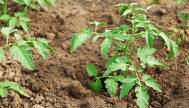
EVS 27: Potato Maze: Make a Plant Obstacle Course!

- Cut a small round hole, about the size of a quarter, at one end (one of the short sides) of a shoebox.
- Cut up several pieces of cardboard, and tape them to the inside of the box, so they stick out like partitions, creating a winding path through the inside of the box. Your child can cut them so they go completely across from one side to another, like a row of walls (in which case she should cut a quarter sized hole in each one), or she can cut them to go partially across, then tape some other obstacles along the box floor as well.
- Put the sprouted potato into the flowerpot, and cover it with moist soil. Make sure that most of the sprouts are facing up. (Note: If you don’t have an already sprouted potato, you can leave one in a dark place at room temperature and wait for it to sprout. It can take as long as six weeks. Or, you can use a small vine plant, like a bean or ivy, instead of the sprouted potato.)
- Place the flowerpot on the opposite end of the shoebox, away from the hole. Cover the shoebox with the lid and put it in a sunny place, with the hole facing the light.
- Ask your child what she knows about plants and what they need to grow. Do they need water? Sun? Food? If you like, you can talk a bit about the fact that plants need light and oxygen to produce food. You can teach her the fancy term for the process of converting sunlight to the fuel they need to grow: photosynthesis.
- Every 2-3 days, lift the lid and take a peek as you water the plant.
Depending on the time of year, the potato, and the obstacle course created, this experiment can take a few days, or more than a week. Either way, it’s a great way to watch something you’d never expect: a plant complete an obstacle course! A-maze-ing!
Discuss: What does she think the potato plant will do in its attempt to find sunlight? Ask her to make a prediction.
Quiz: There are some flowers that only bloom at night, when there is no sunlight. Why?
EVS 28: Create a Sandwich Bag Explosion!

- Draw a square measuring about 5–6 inches on each side onto a paper towel. Ask your child to cut it out.
- Measure out the baking soda and help him scoop it into the middle of the towel. Fold the towel inwards on four sides, so you have a little packet of powder. It should look like a sachet, with the powder contained inside.
- Mix the vinegar and warm water together, then pour it into the sandwich bag.
- Give your child the paper towel packet you’ve just made and tell him to quickly but carefully drop it into the bag, then immediately seal it closed.
- Standing in your outdoor area, let your child shake the bag a bit. Then put it on the ground and stand clear!
Get ready to see chemistry in motion! As the vinegar and baking soda combine, they’ll produce carbon dioxide, inflating the bag until it’s bursting at the seams. When the bag can no longer contain what’s inside, it will burst, creating a very loud pop. Be sure to keep extra materials on hand—they’ll likely want to do this one again. Bombs away!
Quiz: What constructive role do explosives have to play in society?
EVS 29: How to Make a Wind Vane

- Start by putting the lid on the plastic container, and turn the container upside down. Trace around the lid, and then make another circle around the outer edge, at least 2 inches wider than the first one.
- Use a ruler to divide the lid in half along its diameter, and then divide each of those halves in half. Have your child write the words for the four parts of the compass along the outer edge of each of the four sides. Moving from the top, clockwise, she should write “North, East, South, and West.”
- Now open the container. Stick a blob of modeling clay or putty on the bottom of the container, and then fill the remainder to the top with pebbles or sand. Snap the container lid on and tape it, if necessary, to keep it secure.
- Glue the container, upside down, onto the cardboard compass base you just made.
- Take the sharpened pencil, and poke it through the center of the plastic container so that the eraser is on top, and the point is held by the putty and sand.
- Now, cut a broad triangle and a square, both about 3 inches across from your construction paper. Cut a slit in each end of the straw. Slide the triangle onto one end and the square onto the other. Use a bit of glue if they seem to slip. Push the pin through the center of the straw and attach it to the top of the pencil eraser. If you flick the straw, or blow on either end, it should move freely.
Quiz: What is the use of a wind vane?
EVS 30: Learn Shadow Science

- Pick a morning when the sun is shining brightly. Before you head outside, sit down with your child and show her how to make a table so she can record her findings. Help her write three different columns: Time of Day, Shadow Length, and Body Length.
- Make sure she records the time of day in her table, then head outside.
- Now, have her stand still while you trace her shadow on concrete with chalk, and help her label the tracing with “Shadow” and the time of day.
- Next, have her lie down on the sidewalk while you trace the outline of her body. She can label this tracing with “Body” and the time of day.
- Encourage her to use the tape measure to find the length each tracing, then record the measurements in her chart. Which one is longer? Explain to her that the length of the shadow depends on the location of the sun. The higher the sun is in the sky, the smaller her shadow will be.
- Repeat this process a few times throughout the day. Each time, have her record the time, then compare the differences in length. Did the length of the shadow change? What about the length of her body? At what times was her shadow the shortest and the longest? Discussions like this help her build important critical thinking skills.
Quiz: Will the length of your shadow change with seasons? Why?
EVS 31: Make a Desktop Desert Terrarium

Terrariums are a great way to grow plants that need high humidity. But what do you do if you want a cactus terrarium? Using a glass fishbowl, you and your kids can create a low-humidity, open-topped terrarium perfect for drought-tolerant succulents. Succulents make great plants for kids because they’re easy to care for, only needing a quick spritz from a water bottle every so often.
What are succulents? Desert plant life is largely made up of succulents, plants with thick, often waxy skin. They can survive the dry desert climate because they retain water well, storing it in their leaves, stems, and even roots. One of the best known succulents is the cactus, recognizable by its prickly spines. Succulents come in a wide variety of shapes, sizes, colors, and textures.
- Help your child place a layer of gravel in the bottom of the fish bowl. This will help keep the roots dry if the terrarium is over-watered. Remind your child that it rains very little in the desert.
- Cover the rock layer with about one inch of sand.
- Have him use the spoon to scoop out a hole in the sand. (It doesn’t have to be deep because desert plants have shallow roots to absorb rain quickly before it evaporates.)
- Now add the plants to the terrarium, one at a time. Thornless succulents are easy to transplant, but handle cacti gently with a pair of tongs. It may take several tries to get the plants to stay upright because of their shallow roots.
Once everything is in the terrarium, find a sunny desk or dresser top for it. Don’t forget to use a spray bottle to water them once or twice a week—even deserts have rain once in a while.
Quiz: What are the ways in which a cactus reduces water loss?
EVS 32: Recycled Calendar

Earth Day is a time to appreciate the environment and think about the impact we have on our world. Though Earth Day is just one day, being conscious of the environment should be an everyday thing! This year, inspire your child to be more environmentally friendly in his daily life by encouraging him to change one habit or do one good deed each month. Help him keep track of his pledges with an earthy calendar that’s made entirely out of recycled and reused materials. By the end of this activity, not only will he be more aware of the impact his actions have on the environment, but he’ll enjoy the pride of knowing that he is helping to make a difference!
- First make a cover for your calendar. Have your child trace the dinner plate onto each piece of cardboard.
- Help him cut out the circles from the cardboard. Punch a hole at the top of each cardboard circle, making sure the holes line up when the circles are stacked.
- Now that you have the cover, make the inside pages. Have him trace one of the cardboard circles onto each sheet of scratch paper and cut them out. You should now have twelve round sheets of paper, one for each month.
- Stack the sheets of scratch paper together and punch a hole at the top, making sure you punch through the whole stack.
- Now make grids for each month. Help him use a ruler and markers to draw a 5 row by 7 column grid on each sheet. Write the name of the month at the top of the page and the names of the days above their corresponding columns.
- Number the boxes with the correct day numbers. Have him write special holidays and birthdays on the calendar if he likes.
- Once the calendar pages are complete, have him put the pages in the correct order according to month and place them between the cardboard circles.
- Bind the calendar together by threading the ribbon or piece of fabric through the hole and tying a bow at the top.
- Now decorate the cover. Have your child write a big “2010” in marker, arrange the blue and green paper scraps and found natural materials into a recycled paper Earth, using blue scraps for oceans and green scraps for land. Try outlining the continents with marker first to make it easier.
- For the finishing touch, invite him to think of twelve pledges he can make to be more environmentally conscious in his daily life. Good ideas include pledging to use less water, planting a tree, turning off lights when he’s not using them, recycling, or starting a compost pile in the backyard. Some of these are a little more difficult and require adult help, so make sure you make these pledges together and only choose ones you’re committed to fulfilling!
- Now go through the calendar and write one pledge at the top of each month.
- Hang up the calendar in a spot that’s easy for him to see. Over the course of each month, encourage him to follow his pledge each day. If the pledge is a project, like planting a tree or garden, set aside time to work on it with your child and try to complete it by the end of the month.
Discuss: This activity is a great way to teach your child how to be more aware of his impact on the environment. After each pledge period ends, however, remind him that he doesn’t have to go back to old habits. Encourage him to make each pledge a lasting commitment to stick to for years to come.
Quiz: What is more important: Reduce, Reuse or Recycle?
EVS 33: Candle Burning Experiment
Fire is a chemical reaction that creates light and heat from oxygen and fuel. A lit candle needs to draw oxygen from the air in order to continue burning. If you limit the amount of air available, the candle’s flame eventually goes out once it uses up all the oxygen. Here’s a science experiment that gives your child a chance to see this concept in action, with a little math and writing practice thrown in.

- Begin by explaining to your child that fire needs oxygen from the air in order to burn. Ask her what she thinks will happen if you limit a candle’s oxygen supply.
- Light the candle and place one of your jars over it. Watch and wait until it goes out. Was this what she expected to happen? What does she think will happen if you place a larger jar over the candle? How about a smaller jar?
- Put the jars in a row from smallest to largest, and help your child write the numbers 1, 2, 3, and 4 on the sides in permanent marker.
- Ask her to estimate how long it will take for the candle to go out as you place each jar over it. Make a table like the one below to record her estimates.
| Time Estimate | Actual Time | |
| 1 | ||
| 2 | ||
| 3 |
- Light the tea candle, and place the first jar over it. As you do so, have your child start the stopwatch. How long does it take for the candle to go out? Record the actual time next to her estimate.
- Repeat step four with the three remaining jars.
- Compare your child’s estimate to the actual length of time each candle burned. Did she predict that the candle would burn longer under larger jars? If not, point the pattern out and explain that the more air inside the jar, the longer the candle is likely to burn.
Discuss: What was the reason for your prediction? Did your prediction match the observations?
Quiz: What can you conclude based on your observations?
EVS 34: Dirt Tracks

Is your child curious how characters in books and movies are often able to track the movements of other people or animals by studying and following the tracks they make in the dirt? Conduct a simple experiment with your child to study how dirt tracks change as they age.
- Start by talking about tracks with your child. What are tracks, and where do they come from?
- Have your child rake the patch of soil to loosen the dirt. Ask him to make a clear track of some kind, such as his hand or footprint.
- Have him describe the track’s appearance in his notebook and record the time and date. How clear is the track? How deep is it? Are there any major marks around or on top of it?
-
Once or twice a day for the next several days, check the track with your child and have him make notes about any changes in its appearance. These changes may include:
- Crumbling edges caused by wind and rain
- Debris covering the tracks such as fallen leaves or pine needles
- Other tracks or marks (such as cat footprints) blurring part of the track
- At the end of the experiment, talk to your child about what he’s learned. If he were tracking a real person or animal, what clues could he look for on their tracks to help him determine when they had passed?
Real trackers do not have records in a notebook to tell them when a track was made, but they do have detailed knowledge of the world around them. If they can see that a track was made before a rainfall, and they know it rained four hours ago, then they know the track is more than four hours old. If a track is free of loose leaves and debris, whereas the rest of the ground is full of them, trackers know the track is very fresh.
If your child enjoyed this activity, you can extend it by taking him to a place where tracks are easy to find, such as a park with a muddy stream bed or sandy wash. Find some of the clearest tracks, and let him use the signs to make educated guesses about when people and animals have passed by.
Quiz: When do tracks last the longest? Why?
EVS 35: Make an Accordion Skeleton

- First, cut the arm and leg pieces. Measure and mark four ¾” stripes across the short side of the paper and have your child cut them out.
- Next, have him accordion fold the strips, starting at one end and folding back and forth all the way to the other end.
- Sketch out the skull, ribs and pelvis shapes on half of the remaining sheet of paper (it’s easiest to fold the paper in half to get symmetrical shapes).
- Help him cut out the shapes while you sketch out the hands and feet, then have him cut those out too.
- Using the black marker, draw outlines on the skull, ribs, and pelvis for your child to color in. Outline the eyes and nose on the skull, the ribs of the ribcage, and the holes in the pelvis.
- Have your child carefully color in all of the outlines and draw the skeleton’s teeth.
- Cut one longer piece of spine and one shorter piece from the remaining white paper.
- Lay out the pieces before assembling them and make sure hands and feet are placed properly before gluing.
- Finally, help him glue all the parts of the skeleton together.
Discuss: Feel your major bones and correlate with that in the skeleton. What is the longest bone in the skeleton?
Quiz: Name some living things that don’t have skeletons.
EVS 36: Plant Observation

- Prepare the amaryllis bulb by soaking it in lukewarm water for several hours. If you are unable to plant the bulb right away, store it at a low temperature of 40-50 degrees F. You may choose to follow the directions below for planting or follow directions that came with your bulb.
- Plant the bulb in a flowering pot with potting compost up to the bulbs neck. Press the soil firmly around the bulb.
- The best temperature for the amaryllis bulb is between 68 and 70 degrees. Do not water often until the stem appears. Once the stem is visible, you can water more often.
- Once your child has planted the bulb, create a journal to draw and write observations. You may choose to purchase a journal or make one from at least ten pieces of blank paper. If you want to get really fancy, use five pieces of binder paper and five pieces of plain white paper so that your child can write on the lined pages and draw on the blank ones.
- Staple the pages in between two pieces of construction paper. Write “My Plant Observation Journal” on the front, and have your child write her name on the front as well.
- Have your child begin drawing and writing her observations of the amaryllis bulb on a weekly basis once the stem becomes visible. She may include the length of the stem, number of leaves or buds, smell, color, etc. You may also help your child calculate the differences of stem size, number of flowers, etc. from week to week.
- Make sure to write the date in the upper right corner of the blank page for each new entry.
Now that your child is a skilled botanist, she may want to observe other plants or try growing a new amaryllis! Like any good scientist, she’ll have her notes ready in her plant observation journal for further study.
Discuss: When is the rate of growth the plant the highest?
Quiz: What are the factors that determine plant growth?
EVS 37: Funny Food Faces

- Before you begin, cut the apple into wedges.
- Give your child two apple wedges that will represent the lips of the monster mouth. He can use the plastic knife to spread peanut butter on one side of each wedge.
- Help your child take each one of the wedges and place a line of marshmallows into the peanut butter along the thicker part of the wedge. These will be the monster’s teeth!
- Stack the apple wedges on top of each other, marshmallow side facing in. Secure the mouth by sticking a toothpick through the center to hold it all together.
The monster mouth is finished! Your child should feel free to play with his food before eating up this healthy snack.
Quiz: Think of other ways in which we can make eating more fun.
EVS 38: Build a Zucchini Racer

- Lay zucchini on your child’s workspace.
- Help her poke two dowels, wires, or pipe cleaners through the zucchini: one at the front and one at the back. These will be the axles! It may be easier to poke holes in the zucchini with a toothpick before inserting the axles.
- Attach a wheel to each axle on either side of the zucchini.
- Personalize the racer using decorative art supplies. Add eyes, hair, spots, sparkles—the only limit is your child’s imagination!
Once the racer is constructed, build on the activity by creating a “road” on a large sheet of paper, making traffic signs from cardboard, or constructing a ramp to roll the zucchini racer down.
Discuss: What is fast food?
Quiz: What happens when the car that you built turns in a small circle?
EVS 39: Egg Carton Garden

- Remove the lid from the egg carton.
- Fill each section about ¾ full with gardening soil. Check with your local nursery to determine which variety is appropriate for the types of plants you want to grow.
- Place the seeds in the soil according to the package directions.
- Place the egg carton in a location with plenty of natural light and water the seeds regularly according to the care directions listed on the seed package.
Your child will delight in watching her miniature container garden grow. Once the seedlings have developed, transplanting them to your garden or to larger pots is a snap—just cut the egg carton sections apart and place the entire piece, egg carton and all, in the ground. The egg carton will disintegrate and your plants will continue to grow!
Quiz: Why did we transplant after the seedlings developed?
EVS 40: Scary Science with Spiders!

- Before you get your young learner involved, create a painter’s tape spider web. You can make it in an open doorway, a hula hoop or a large picture frame. All you need is something large and open to support the web. Stretch a few long pieces of tape from side to side across the opening. These are the support strands that stretch side-to-side and top-to-bottom across the web. Use smaller pieces to create the spiral out from the middle.
- When you are done, invite your child to place the insects on the sticky side of the web.
- Now ask her to press her fingers onto the web. How does the web feel? It should be sticky to the touch. The sticky web catches the spider’s dinner. How does she think the spider keeps from sticking when it ventures out to grab this meal?
Discuss: Why do you think spiders are not stuck in their own web?
- Show her online photos of a spider’s web. The support strands, the long strands that run across the entire web, are not sticky. The strands that form the spiral are. Scientists thought that spiders simply walked on the support strands.
- Now have her dip her fingertips into the oil. Do they still stick to the web? Recently scientists discovered that spiders have an oily substance on their legs. This oil helps keep them from getting stuck in their own webs
Quiz: What would be the problems in making a cloth by weaving spider filaments?
EVS 41: Hand Fans!
Make a hand fan. Some suggested designs below:


Switch off the ceiling fan. Make one student fan each other. Then ask the student who is being fanned to leave the room for 2 minutes.
Discuss: What did the pankha wallah do when the student left? Why did they stop? Why do we continue running fans even when no one is in the room?
How much energy is required to power a fan? Get people to actually make a fan and use it. Talk to the children about switching off lights, fans etc. when not required.
Quiz: Why do we feel more comfortable with a fan?
EVS 42: Match the cap to seasons!
Make drawings of as many different cap types that you know of.
Discuss: What is the importance of caps? Why do we have so many different cap types?
Teacher Hint: Take 2 balls to illustrate earths rotations, revolutions and tilt – and how our concept of time is dependent on these movements.
Quiz: Shown below are 3 caps. Which cap for which season?


 EVS 43: Topography coloring
2 topographies. Color one for summer, one for monsoon.


Discuss: How do some plants survive in summer and some don’t?
Quiz: Which of these plants will survive summer?


 EVS 44: Animal Sort
Get picture cards of animals. Students had to sort them out into 3 buckets, based on whether they were land, water or air animals. The interesting cards were like ducks – which could fit in either land, water or air. Interesting. Can be built up to include more of such ‘overlapping’ animals.


Discuss: Which of the above animals eat only plants? Which eat insects? Which eat fish?
Quiz: Which is your favourite animal? Why?
Key: Land: Lizard, Tortoise, Bear, Fox, Leopard;
Water: Turtle, Seal, Shark, Whale
Amphibious: Hippo, Frog, Beaver, Salamander
EVS 45: Drying Leaves
Collect 10 different types of leaves
Dry leaves between book pages

Discuss: What functions does a leaf perform? Why are leaves green?
Quiz: Why is the midrib thicker than the veins?
EVS 45: Collecting Ants
A butterfly got stuck in a window net – and students were excited to look at it closely. She was sent to the garden and fetched us an ant and a spider. Asked her to count the legs in the ant. The spider vanished as soon as she opened the paper!
In the insect observation exercise, we can also use a fly killer racket to study flies that have been shocked by the students. A good magnifying glass would be helpful for that.

Discuss: What things can we do which will keep ants away. Try a few experiments with the ants that you have captured. Get a magnifying glass and observe the ant under it.
Refer: https://food.ndtv.com/health/how-to-get-rid-of-ants-8-home-remedies-that-do-the-trick-1666939
Quiz: What do you think is the main food of ants?
EVS 46: Bird Flight
Go to a place where birds are around.
Check how they take flight and how they land.
Ask students to make drawings of that.

Discuss: How do birds fly?
Quiz: What do birds do with their legs when they fly?
EVS 47: Sprouts Observation
Students to get some dals from home.
Put it in wet cloth for 2 days
Observe the sprouting.
Find a correlation between hard and soft dals – which ones take more time to sprout. Try to find out reasons for the changes in sprouting time.
Discuss: Why are sprouts healthy?
Quiz: Which of the below is a soya bean sprout?


 EVS 48: Bird Nest Building

Go and observe nests around.
Use local material to make a nest.
Discuss: Why do you think birds build nests with such different designs?


Quiz: Which of the above would be the design of a cuckoo’s nest?
EVS 49: Bird Bath
Keep a bird bath in a position that is difficult for our cat to reach.
Observe birds coming in for bathing and drinking.

Discuss: Why do we take a bath? What happens if we don’t bath for one week? What happens if you don’t use soap in a bath?
Quiz: Why do buffalos like mud baths?
EVS 50: Making a weather pictogram
Record how many days it rained in school.
Make a rain gauge
Note down how much was the water collected.
Make a histogram of rain water versus days in the monsoon.

Discuss: What conclusions can you draw about Pune rainfall based on above observations?
Quiz: What is a crop that requires most rain? Least rain?
EVS 50: Making a Compost Pit
Make a compost pit using wood.
Put wet waste into it.

Discuss: What is compost? What is it used for?
Compost is organic matter that has been decomposed in a process called composting. This process recycles various organic materials – otherwise regarded as waste products – and produces a soil conditioner (the compost). Compost is rich in nutrients. It is used for example in gardens, landscaping, horticulture, urban agriculture and organic farming. The compost itself is beneficial for the land in many ways, including as a soil conditioner, a fertilizer, addition of vital humus or humic acids, and as a natural pesticide for soil. In ecosystems, compost is useful for erosion control, land and stream reclamation, wetland construction, and as landfill cover (see compost uses). At the simplest level, the process of composting requires making a heap of wet organic matter (also called green waste, such as leaves,grass, food scraps) and waiting for the materials to break down into humus after a period of months.
Quiz: What happens when you mix dry waste and wet waste?
EVS 51: Rinsing tiffins
Work on ways in which we can reuse kitchen waste water.
How can we rinse our tiffins in order to make fertilizer.

Discuss: How is sewage water treated in the Pimple Nilakh plant? (Actual Google Map below)

Teacher reference: https://www.youtube.com/watch?v=FvPakzqM3h8
Quiz: What is the advantage of the three bucket system?
EVS 52: Growing Vegetables in Pots
Vegetables in old bottles. Half of these plants should be inside the classroom. Half should be outside. Gardening – vegetable patch.
Here are plants which are easy to grow: Mustard, Coriander, Potato, Tomato, Onion, Carrot


Discuss: What nutrients do leafy vegetables give us?
Quiz: Which of the above are root vegetables?
EVS 53: Waste Analysis
Involve the children in an activity e.g. cleaning the cobwebs with sticks/mops or tidying the classroom or class cupboard. Let them pick up papers, wrappers etc. from the school playground and put them into dustbins.

Discuss: How do you think the waste came to lie where it is? What can we do such that it does not happen to come there again? Can we act on it? How many grams of waste do we create in a day?
Quiz: What are things that you as a student can do to reduce the waste generated in your house?
EVS 54: Object Study
Get objects to class. Make students study that object. Make them ask questions about the object. We can ask students to get these objects from home. This activity should be done in groups of 4. Ensure that 2 out of 4 are told to get the object, so that we have at least one object per group. We could use this for the tea pot chapter of Std 1. If possible make students use these objects – for example, a tea pot to heat milk, which can be done using our induction heater, a mosquito killer racket..


Make as many observations about the object as you can.
Discuss: How do you think this object got made?
Quiz: Make a drawing of one part of the object that you have studied.
EVS 55: Rainwater harvesting
Make students visit a borewell.
Understand the function of a pump and how it is used to draw water from the borewell

Discuss: How does water get into borewell? How can we help recharge borewells?
Teacher to discuss principles of rainwater harvesting
Quiz: Why is borewell water not muddy?
EVS 56: Visit to kabaddi walla
Take students to visit a local kabaddi wallah. Or ask one who roams around to come to give a talk to students.
Discuss: What are things that get recycled? What are things that do not get recycled? What is it that prevents recycling? What all would be required in paper recycling? Try recycling old cardboard cartons.

Quiz: Why is it that glass Amul milk bottles are not taken back by the shop keepers, but cold drink bottles are?
 EVS 57: Making a first aid box
Discuss: What are the health problems students face in school. What all should we keep in a first aid box. Each student to get one item to keep in first aid box.

Quiz: Which of these will not be part of a first aid box?


Leave a Reply